




Joint-It Porcelain Epoxy Manual Paving Application Gun
About the product
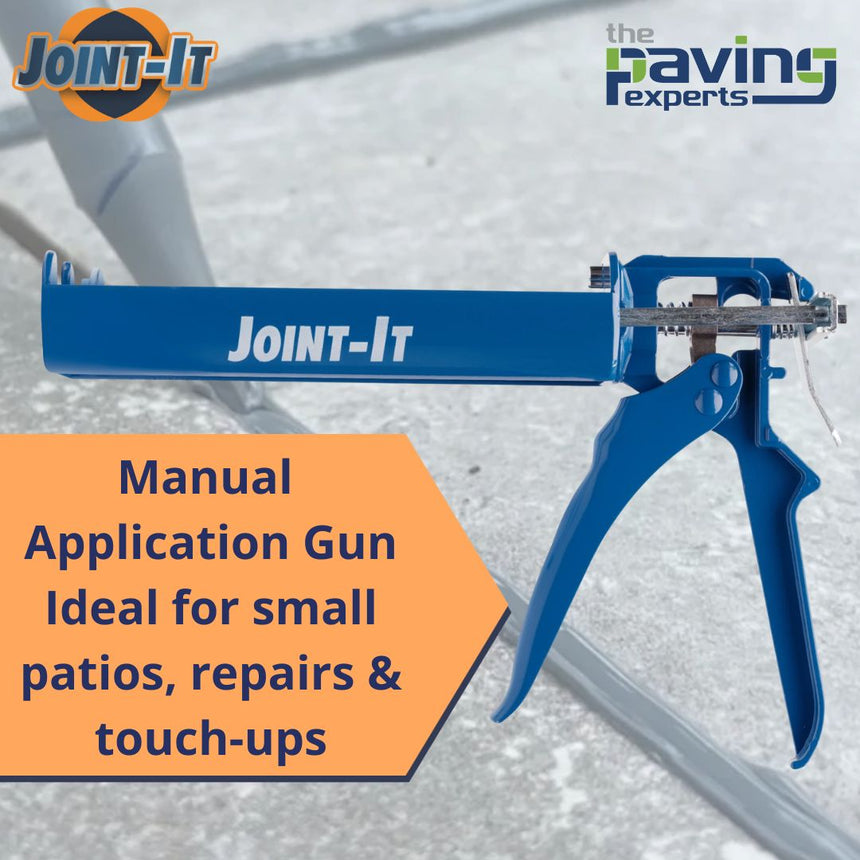
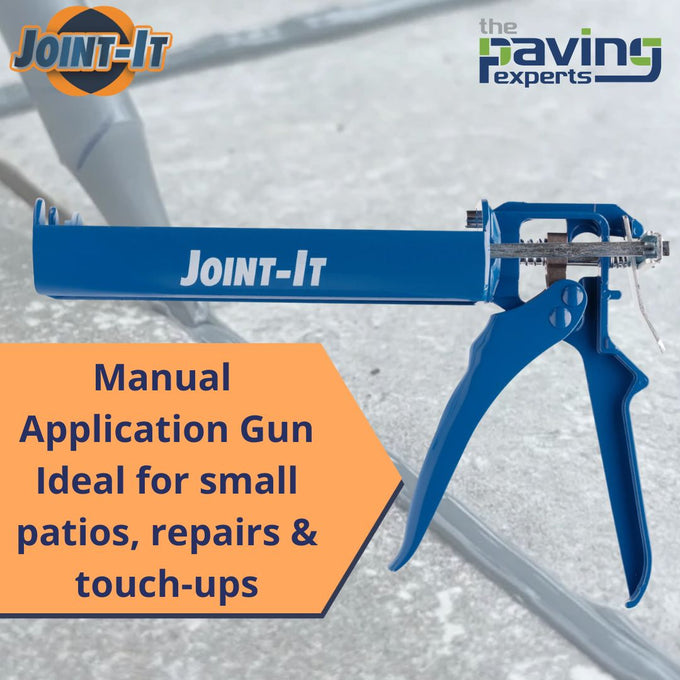
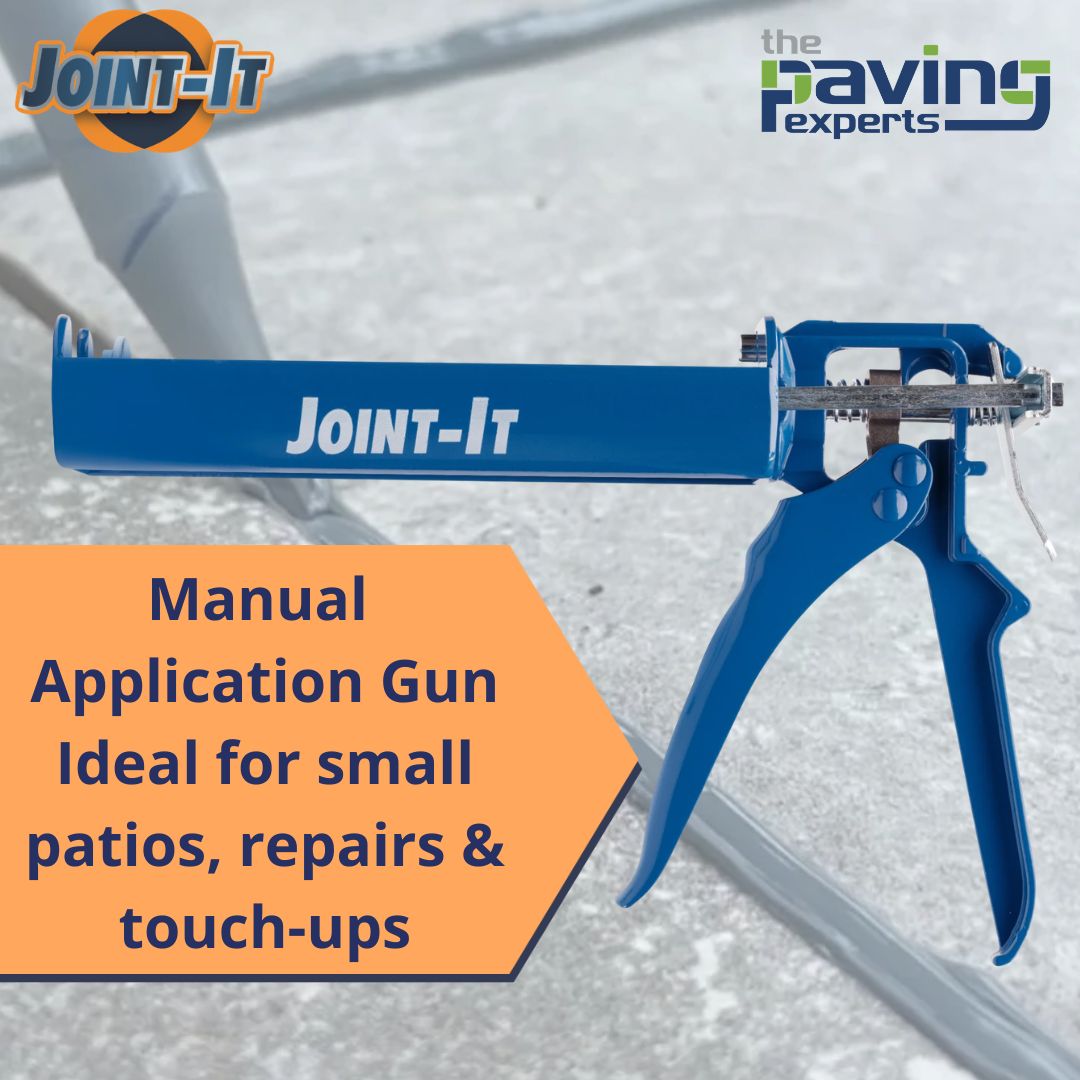
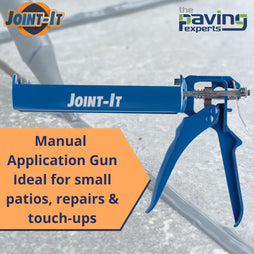
Joint-It Porcelain Epoxy Manual Paving Application Gun is a simple, controlled and low-mess grout gun designed specifically for use with Joint-It 400ml Porcelain Epoxy Grout cartridges. Ideal for outdoor porcelain paving, smooth stone, smaller patios, repairs, touch-ups and DIY paving projects.
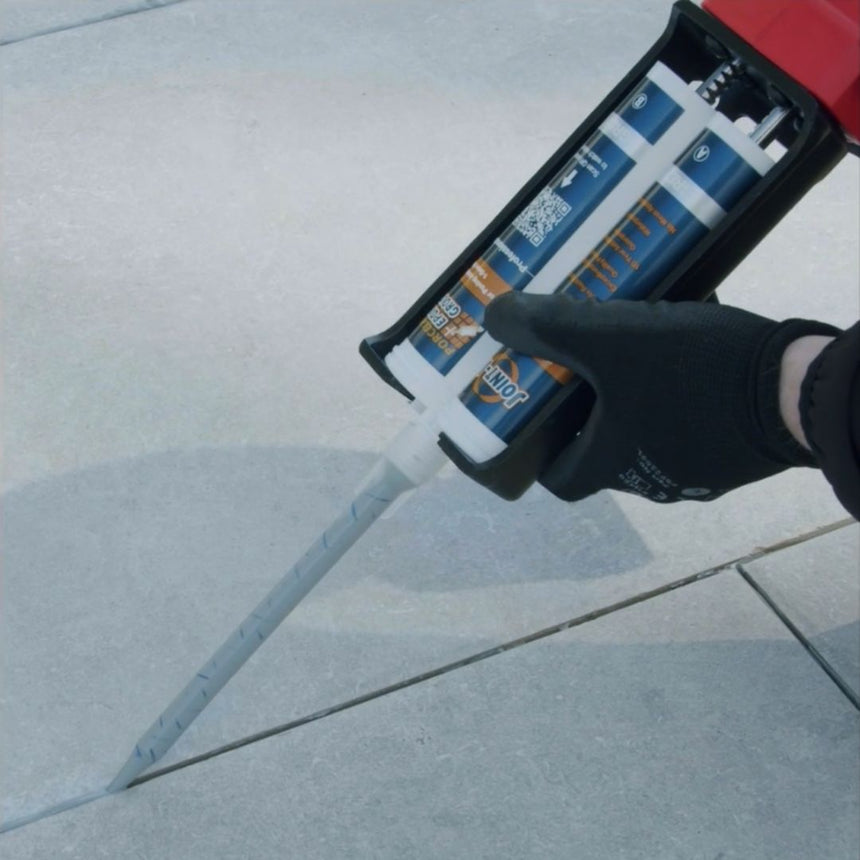
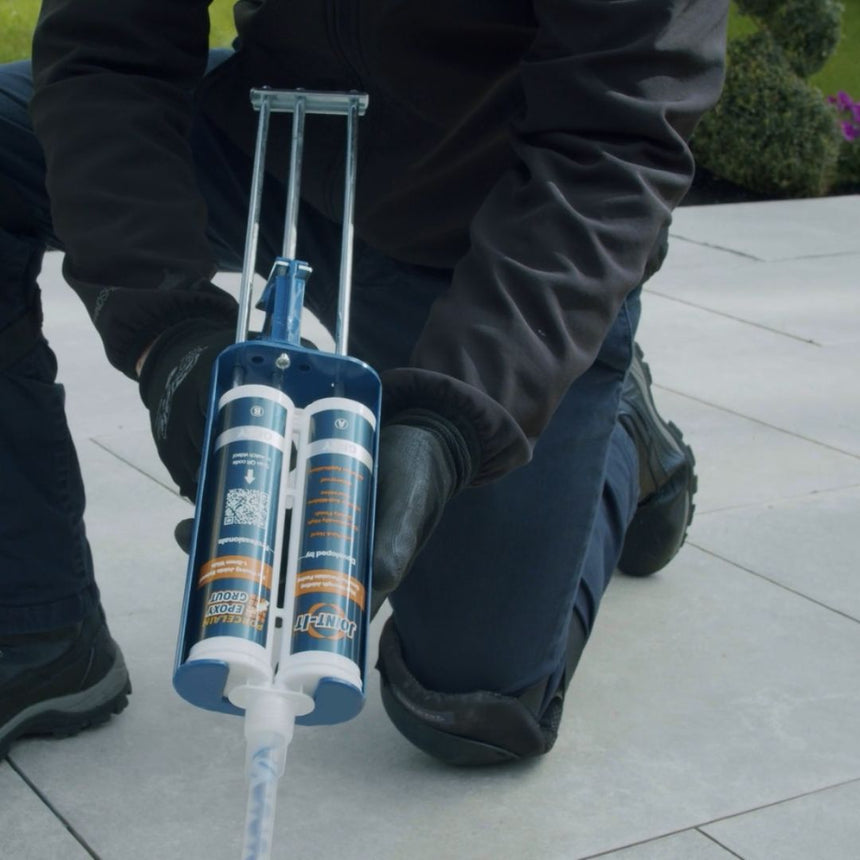
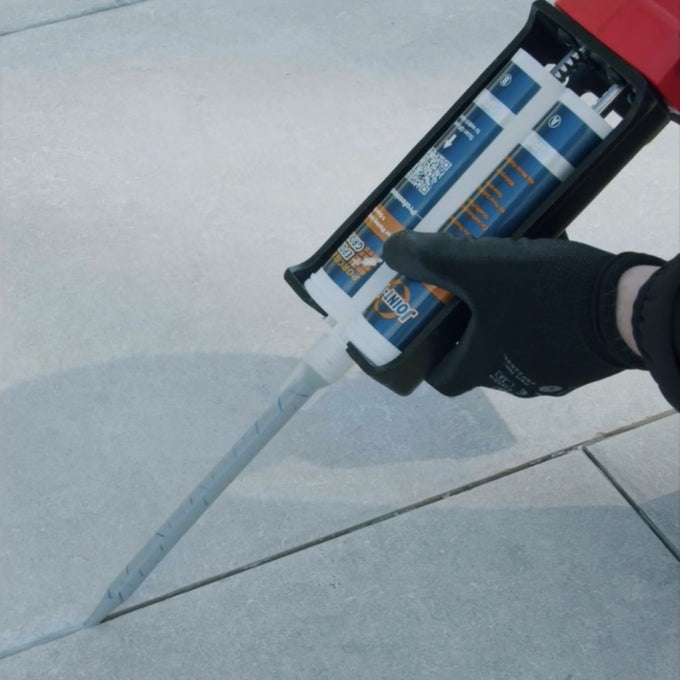
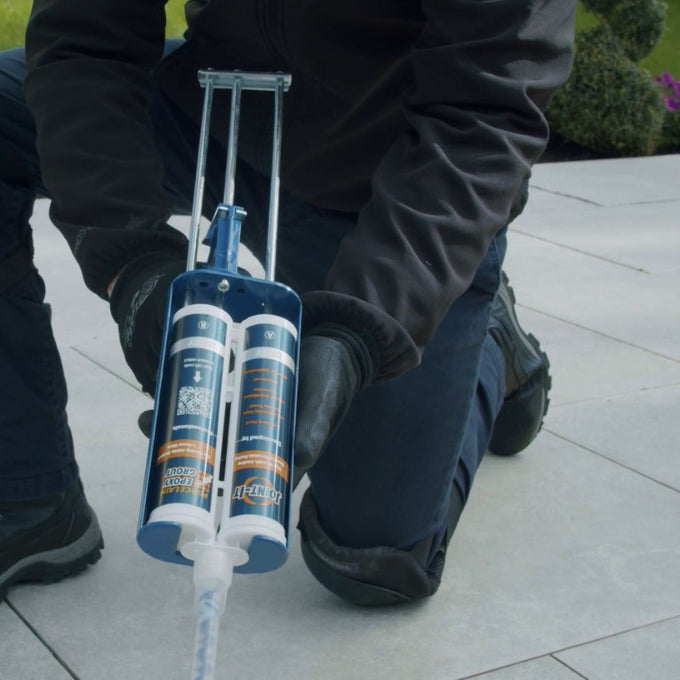
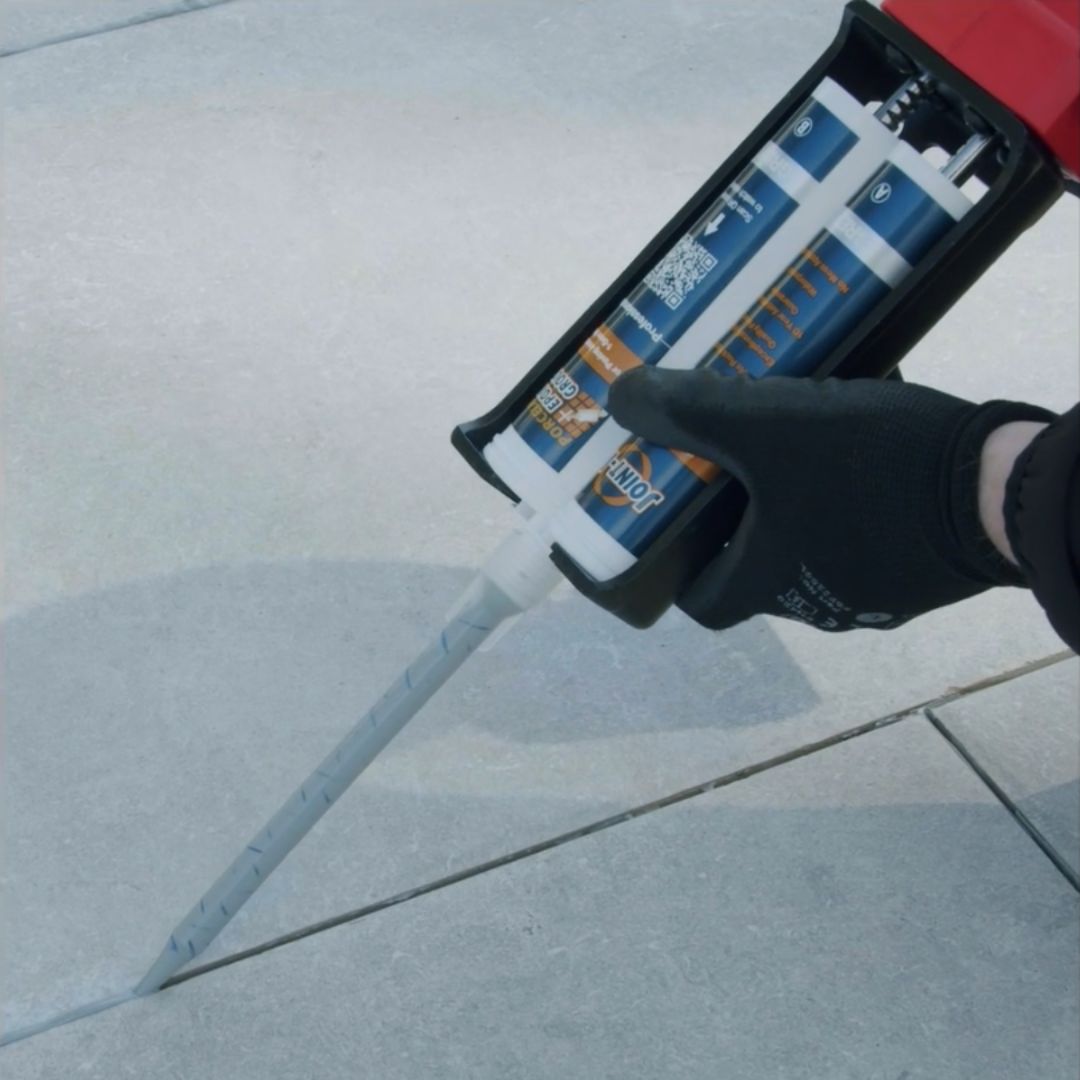
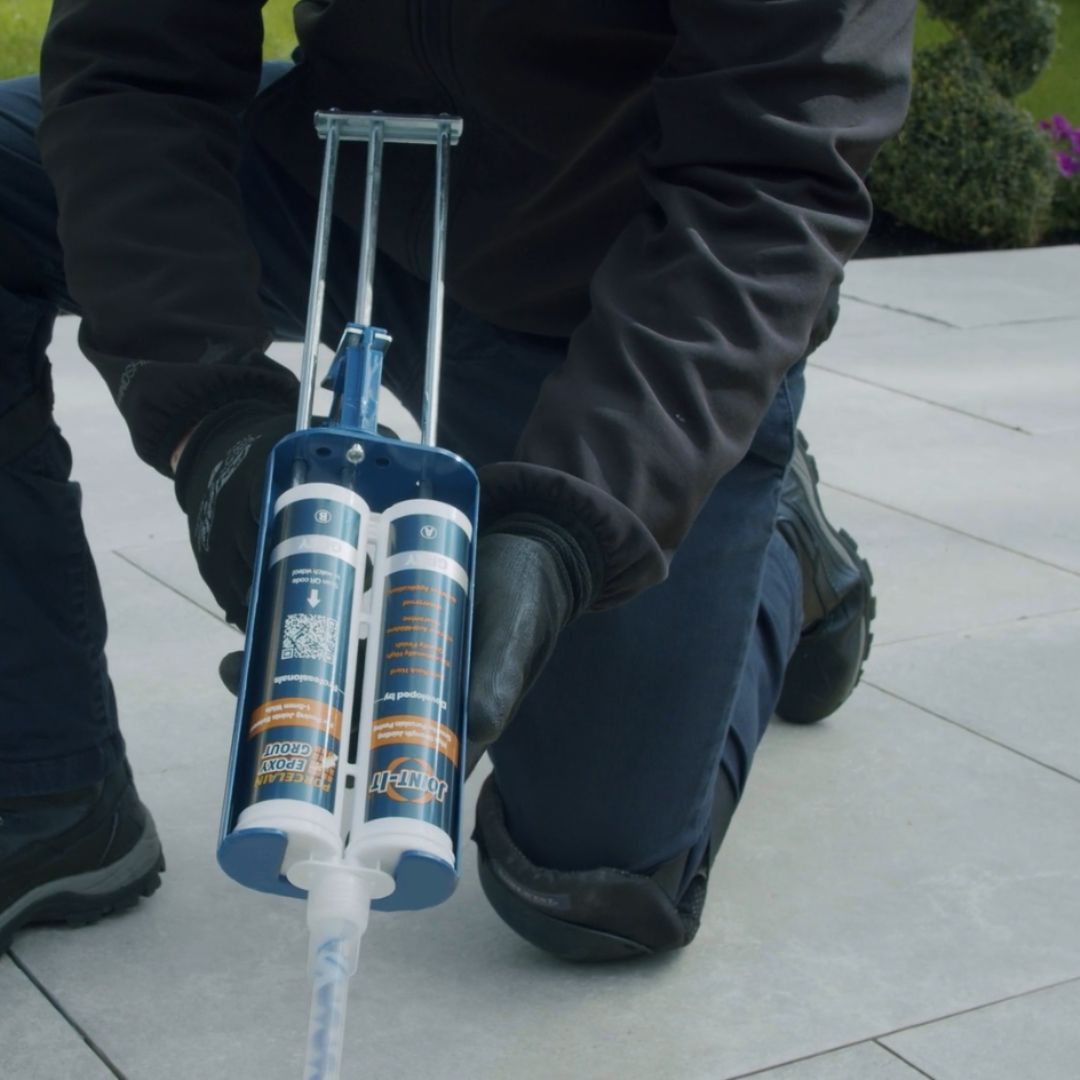
Simply load the 400ml dual cartridge, attach the supplied mixing nozzle and apply the epoxy grout directly into the joint for a clean, consistent and professional-looking finish. The manual application gun gives you precise control without the need for an electric gun.
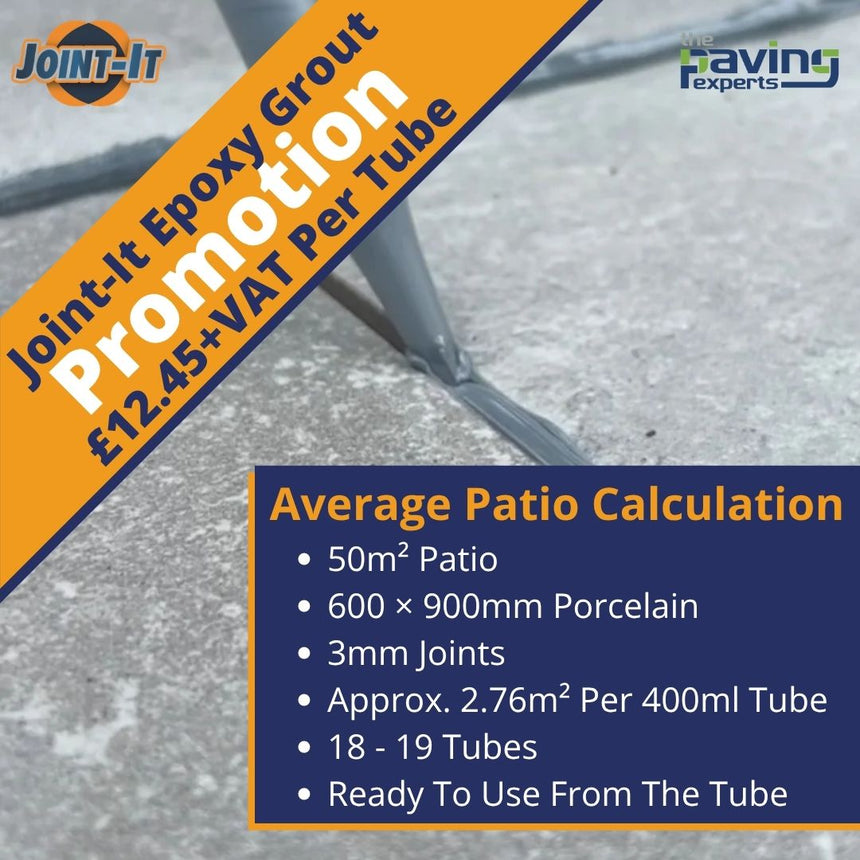
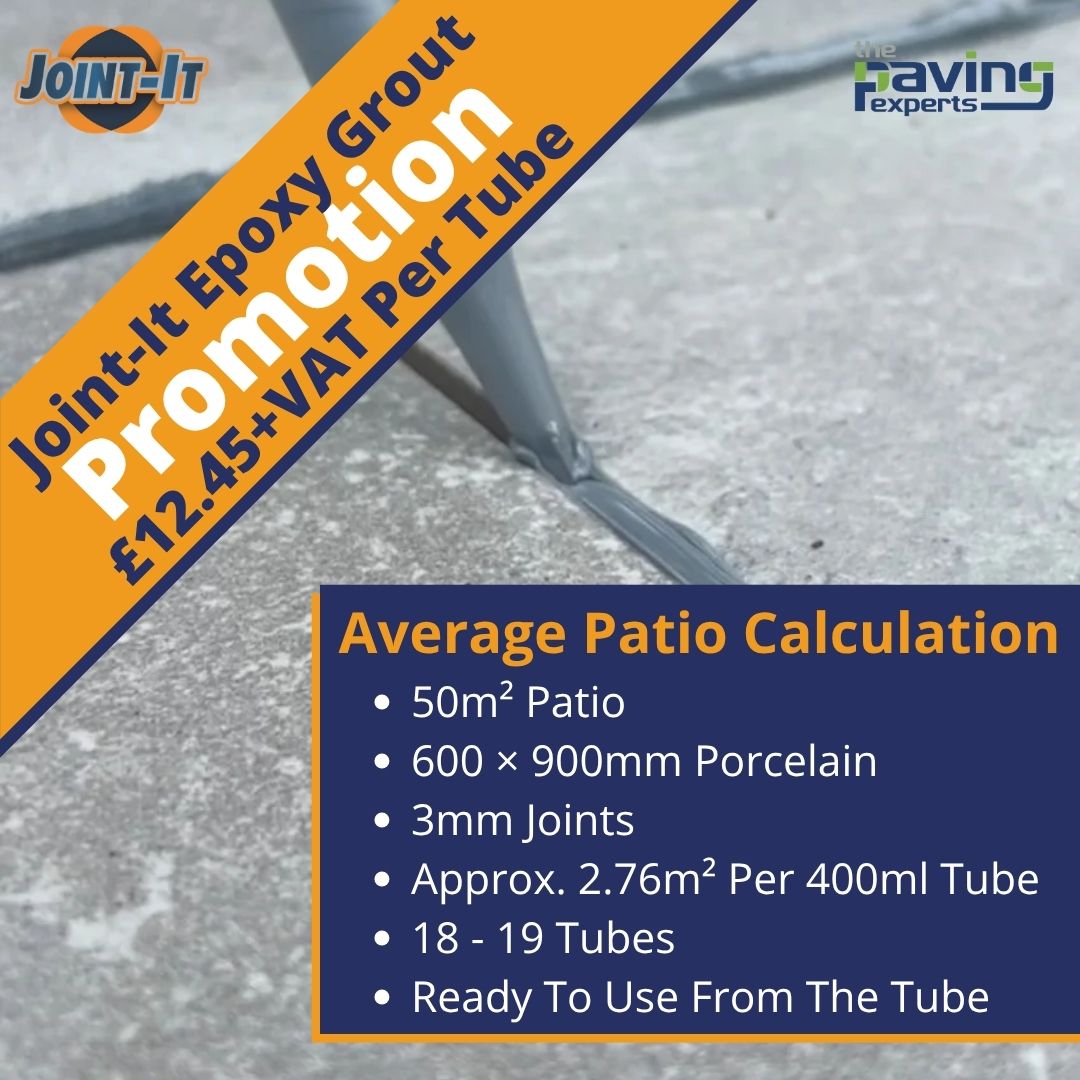
Designed for use with Joint-It Epoxy Grout for 1–5mm joints with a minimum 10mm depth, this manual grout gun is an easy, reliable way to apply paving grout with less mess and fuss than traditional grouting methods.
Ideal for smaller patios, garden paths, repairs, touch-ups and DIY paving projects. For larger areas and continuous professional applications, an electric application gun may be more suitable.
Joint-It Manual Application Gun – the easy, no-mess, no-fuss way to apply epoxy grout.
Got a question about the Joint-It Manual Application Gun? For technical help, check our comprehensive FAQs or send us a message through our contact form. Alternatively, call ☎️ 0330 122 1025 – we’re a small team, but happy to help.
Joint-It Porcelain Epoxy Manual Paving Application Gun


See full delivery info →
For Highlands, Guernsey, Jersey, Isle of Man, and Isle of Wight – call 0330 122 1025.
See full delivery info →
For Highlands, Guernsey, Jersey, Isle of Man, and Isle of Wight – call 0330 122 1025.
About the product
Joint-It Porcelain Epoxy Manual Paving Application Gun is a simple, controlled and low-mess grout gun designed specifically for use with Joint-It 400ml Porcelain Epoxy Grout cartridges. Ideal for outdoor porcelain paving, smooth stone, smaller patios, repairs, touch-ups and DIY paving projects.
Simply load the 400ml dual cartridge, attach the supplied mixing nozzle and apply the epoxy grout directly into the joint for a clean, consistent and professional-looking finish. The manual application gun gives you precise control without the need for an electric gun.
Designed for use with Joint-It Epoxy Grout for 1–5mm joints with a minimum 10mm depth, this manual grout gun is an easy, reliable way to apply paving grout with less mess and fuss than traditional grouting methods.
Ideal for smaller patios, garden paths, repairs, touch-ups and DIY paving projects. For larger areas and continuous professional applications, an electric application gun may be more suitable.
Joint-It Manual Application Gun – the easy, no-mess, no-fuss way to apply epoxy grout.
Got a question about the Joint-It Manual Application Gun? For technical help, check our comprehensive FAQs or send us a message through our contact form. Alternatively, call ☎️ 0330 122 1025 – we’re a small team, but happy to help.
Joint-It Porcelain Epoxy Manual Paving Application Gun
The Easy, No-Mess, No-Fuss Way to Grout Outdoor Porcelain
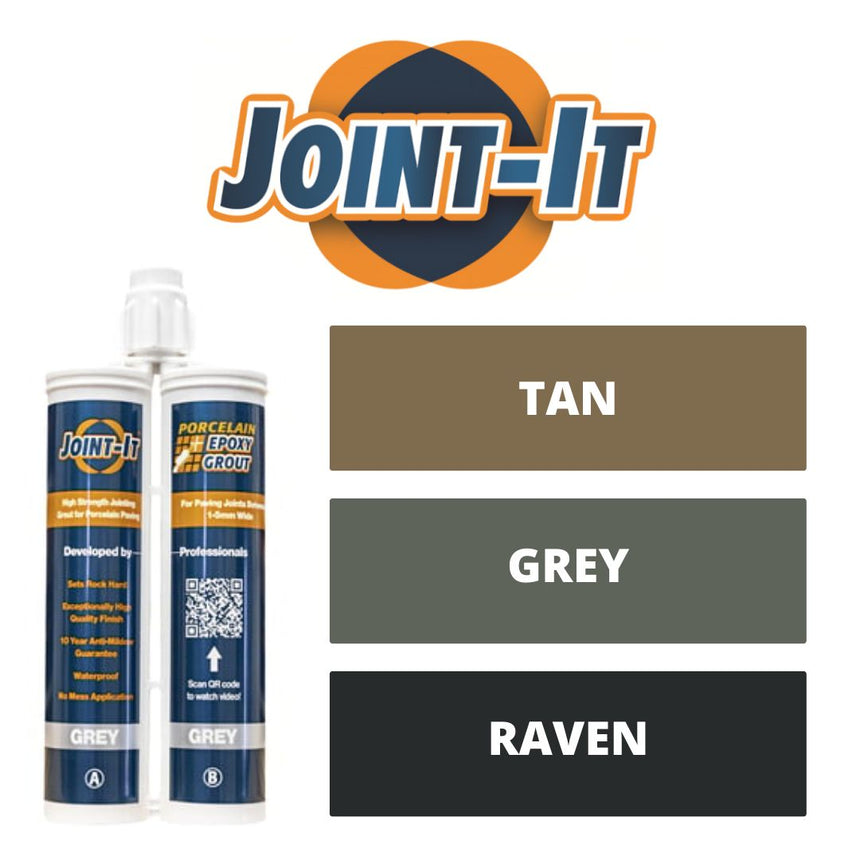
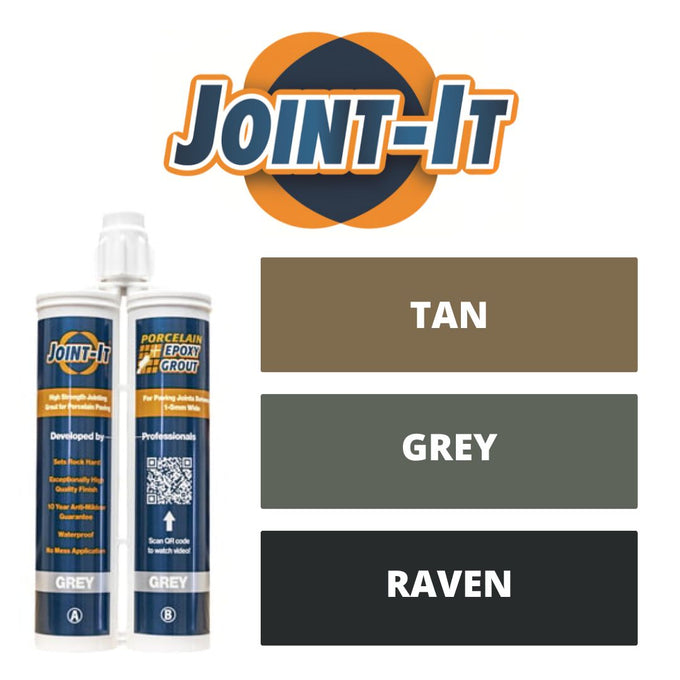
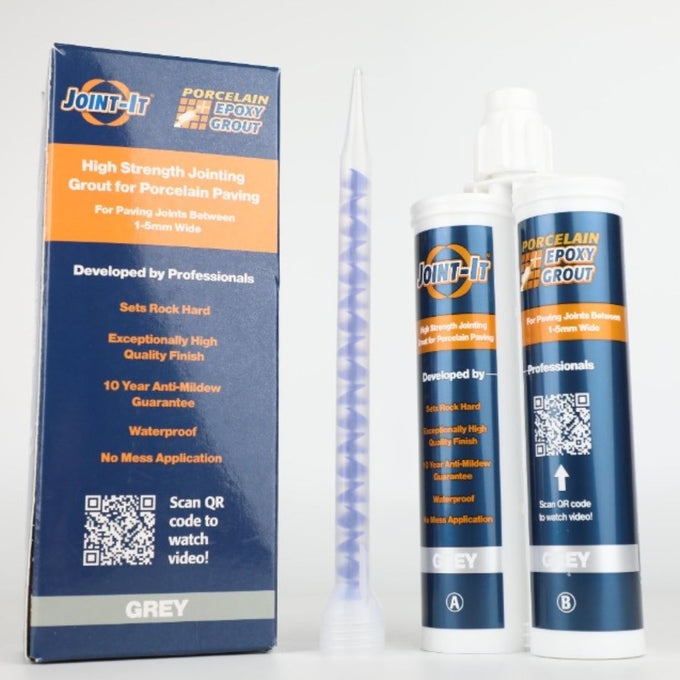
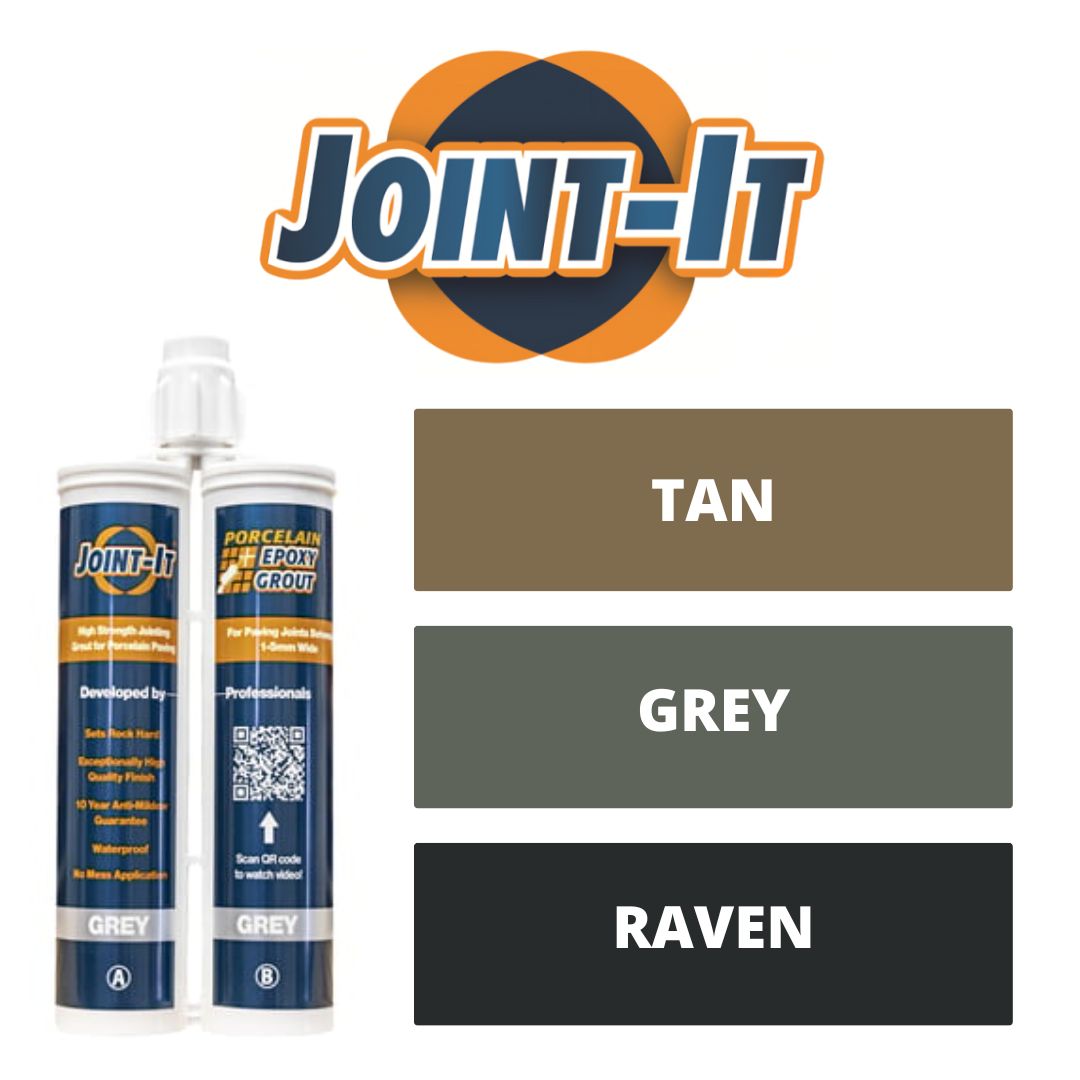
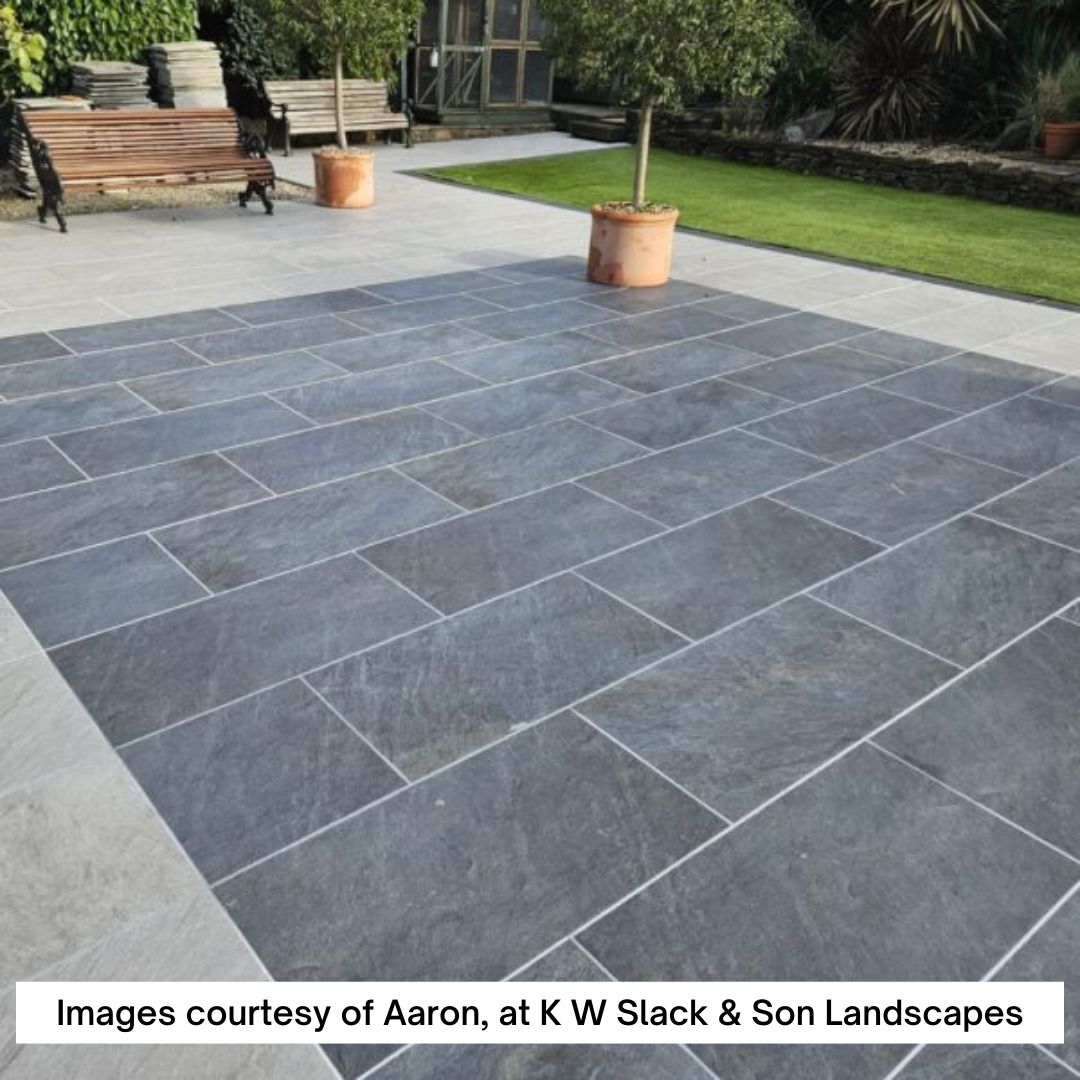
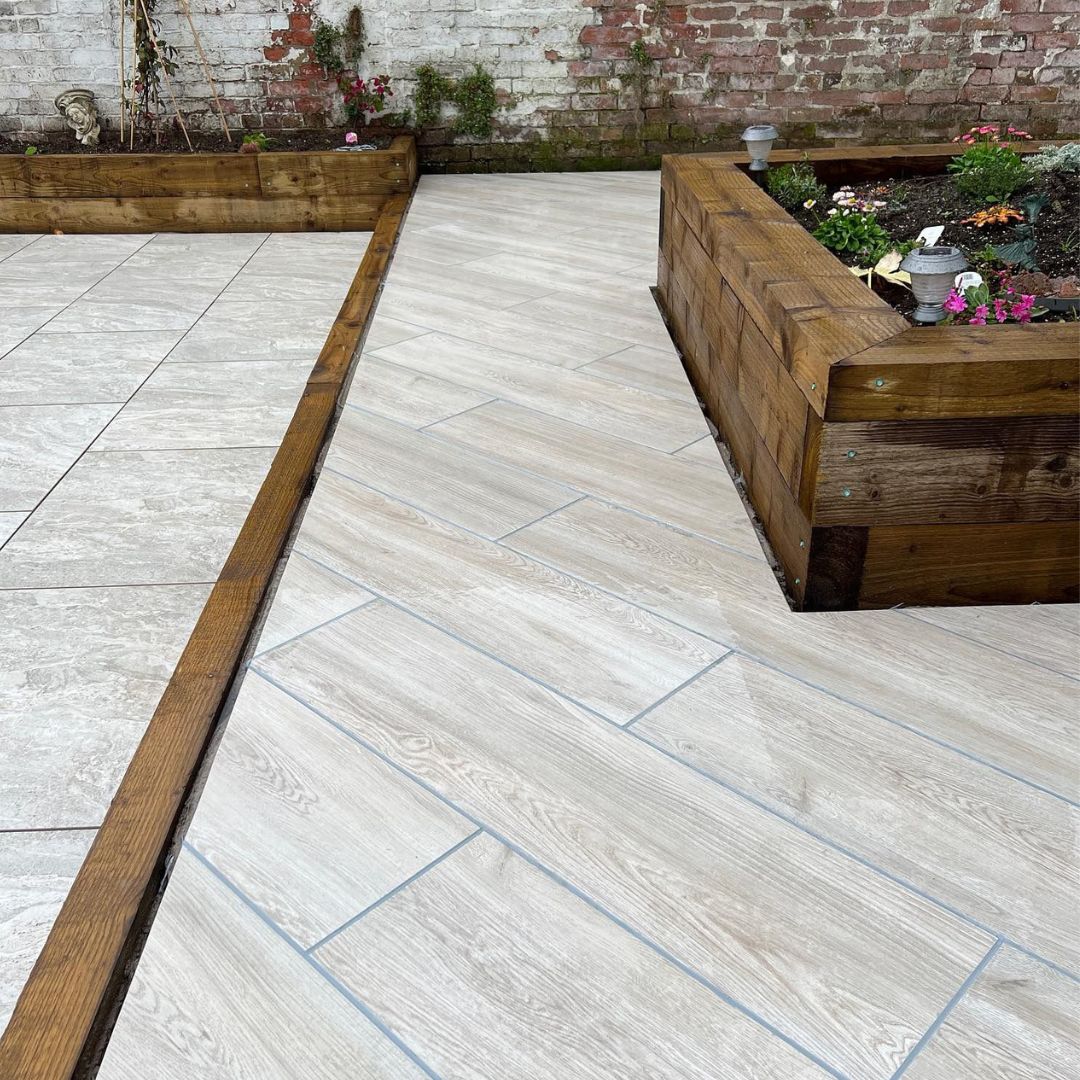
The Joint-It Manual Application Gun is designed specifically for use with Joint-It 400ml Porcelain Epoxy Grout cartridges, in either Tan, Raven or Grey - providing a simple and controlled way to apply epoxy grout to outdoor porcelain paving and smooth stone.
The manual grout gun makes it easy to apply Joint-It Epoxy Grout directly into porcelain paving joints, helping create a clean, consistent and professional-looking finish with less mess and fuss than traditional grouting methods.
Ideal for smaller patios, repairs, touch-ups and DIY paving projects, the manual application gun gives you precise control over the flow of epoxy grout. It is a practical choice when you want the easy, gun-applied benefits of Joint-It without the need for an electric application gun.
Simply load the 400ml Joint-It dual cartridge into the gun, attach the supplied mixing nozzle and apply the epoxy grout directly into the joint. The gun is compatible with Joint-It Porcelain Epoxy Grout designed for 1–5mm joints with a minimum depth of 10mm.
A simple, reliable and low-mess way to apply Joint-It Epoxy Grout.
- Brand: Joint-It
- Product Type: Paving Application Gun
- SKU: TPE-EPOMANAPPAA7
- Weight: 0.5 kg / 1.1 lb
Delivery & Returns Info
Our delivery charges are calculated based on the size and weight of your order. When you add items to your basket, the delivery charges are displayed. Small orders are distributed via courier; larger orders via Pallet Network. Collection is available from our Tamworth depot by request (contact us first to arrange on 0330 122 1025).
Please note, there is a slight surcharge for areas that are outside of our locality, charges calculated at checkout.
| Weight and size | Next Working Day* Order before 1PM (excl. VAT) |
Standard 3-5 Working Day (excl. VAT) |
|---|---|---|
| 0-13KG (1 small bag/tub) |
£14.00 | £9.00 |
| 13.01-25KG (1 large bag/tub) |
£16.00 | £10.00 |
| 25.01-50KG (2 bags/tubs) |
£26.00 | £19.00 |
| 50.01-75KG (3 bags/tubs) |
£36.00 | £28.00 |
| 75.01-100KG (4-5 bags/tubs) |
£46.00 | £37.00 |
| 100.01-249KG (6-9 bags/tubs) |
£60.00 | £45.00 |
| 249.01-750KG (10 bags plus) |
£68.00 | £48.00 |
| 750.01KG plus (30 bags plus) |
£75.00 | £55.00 |
| Full Pallets (56 bags/52 tubs) |
£88.00 | Free of charge |
| Next Working Day delivery (Premium 1-2 Working Day Service) | +avg. £5-10 Extra. Click here for prices |
|---|---|
| Scotland Delivery Service (Deliveries into some parts of Scotland can take 8-10 working days) | Click here for prices |
| Local Delivery & Click & Collect: | Email: orders@thepavingexperts.co.uk |
Delivery Information
- Prices apply to mainland England and Wales. Scottish delivery slight surcharge.
- Orders are packed and dispatched Monday–Friday (excluding weekends & public holidays).
Next Working Day Delivery
- Order before 1PM → same-day dispatch.
- Order after 1PM or on weekends/bank holidays → next working day dispatch.
- You'll receive tracking updates via email/SMS if you provide your details.
Delivery Examples
- Mon before 1PM → Packed Mon, delivered Tue.
- Mon after 1PM → Packed Tues delivered Wed.
- Fri before 1PM → Packed Fri, delivered Mon.
- Fri after 1PM/weekend → Packed Mon, delivered Tues (or Wed after a bank holiday).
- Standard Service: 3–5 working days.
Notes
- Occasional delays due to manufacturing, supply, or courier issues may happen, but we'll keep you informed.
Returns, cancel up to 14 days from date of delivery. Product to be returned in the same condition & packaging. No returns for cementitious & perishable products. You are responsible for the cost of returning goods to The Paving Experts, 20% admin restock fee applies. Need further info, click here.
For further detailed delivery information click here →
For any advice; technical, product, stock or quantity needed, call our team on 0330 122 1025.
Please see our FAQs for more information.






Joint-It Porcelain Epoxy Manual Paving Application Gun
The Easy, No-Mess, No-Fuss Way to Grout Outdoor Porcelain
The Joint-It Manual Application Gun is designed specifically for use with Joint-It 400ml Porcelain Epoxy Grout cartridges, in either Tan, Raven or Grey - providing a simple and controlled way to apply epoxy grout to outdoor porcelain paving and smooth stone.
The manual grout gun makes it easy to apply Joint-It Epoxy Grout directly into porcelain paving joints, helping create a clean, consistent and professional-looking finish with less mess and fuss than traditional grouting methods.
Ideal for smaller patios, repairs, touch-ups and DIY paving projects, the manual application gun gives you precise control over the flow of epoxy grout. It is a practical choice when you want the easy, gun-applied benefits of Joint-It without the need for an electric application gun.
Simply load the 400ml Joint-It dual cartridge into the gun, attach the supplied mixing nozzle and apply the epoxy grout directly into the joint. The gun is compatible with Joint-It Porcelain Epoxy Grout designed for 1–5mm joints with a minimum depth of 10mm.
A simple, reliable and low-mess way to apply Joint-It Epoxy Grout.
Joint-It Porcelain Epoxy Manual Application Gun – Technical Information:
- Product: Joint-It Manual 2-Part Epoxy Grout Application Gun
- Manufacturer: Joint-It
- Capacity: 400ml
- Type: Manual 2-part epoxy grout application gun
- Cartridge compatibility: Designed for 400ml twin/parallel cartridges, including 42mm-diameter parallel tubes.
- Purpose: Designed to apply two-part Joint-It Porcelain Epoxy Grout by forcing Parts A and B through the supplied mixing nozzle and directly into the paving joint.
- Controlled application: Provides controlled, accurate and even dispensing of thick epoxy grout directly into paving joints.
- Operation: The manual trigger and handle apply pressure to the cartridge, dispensing the two epoxy components through the mixing nozzle where they are automatically combined.
- Ideal for: Smaller patios, garden paths, repairs, touch-ups, DIY paving projects and occasional paving work.
- Larger projects: For larger areas or continuous professional applications, a battery or electric application gun may be more suitable, providing faster application with less manual effort.
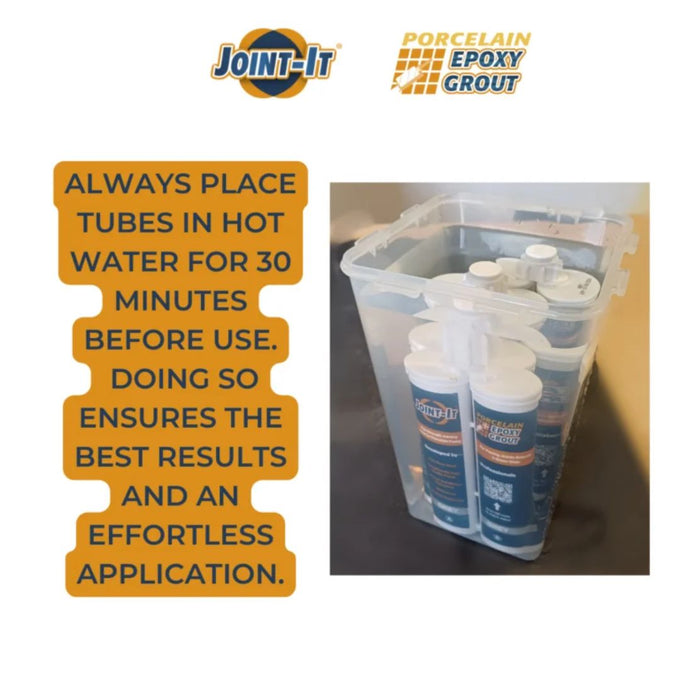
- Epoxy grout consistency: Joint-It Porcelain Epoxy Grout is a thick two-part epoxy, so sufficient pressure is required to dispense the product. Warming the cartridge in warm water before application helps soften the grout and makes dispensing easier.
- Cartridge preparation: Remove the twist cap from the Joint-It 400ml cartridge and securely attach the supplied mixing nozzle before loading the cartridge into the application gun.
- Nozzle preparation: Cut the mixing nozzle at approximately 45° using a clean, sharp Stanley knife. Adjust the opening to suit the paving joint, ensuring the aperture is large enough to allow the epoxy grout to flow smoothly.
- Initial discharge: Before applying the grout to the paving, dispense and discard approximately the first 2cm of material. This ensures Parts A and B have mixed thoroughly and the epoxy grout has activated. The material should appear as a consistent, uniform colour before application.
- Application technique: Place the nozzle directly over or into the paving joint and operate the manual gun slowly and continuously. Maintain consistent pressure and movement to achieve an even flow of epoxy grout and minimise gaps within the joint.
- Joint filling: Apply enough Joint-It Porcelain Epoxy Grout to completely fill the joint, allowing the grout to sit slightly proud of the paving surface so it can be tooled and finished correctly.
- Cleaning and maintenance: Clean any residual epoxy grout from the application gun after use to help prevent material from curing within the gun and maintain reliable performance.
- Gun supplied separately: The Joint-It Manual Application Gun is an application accessory and does not include the Joint-It Porcelain Epoxy Grout cartridge unless purchased as part of a specific kit.
Joint-It Porcelain Epoxy Grout Application Process Using the Manual Application Gun:
- Joint-It Porcelain Epoxy Grout is a high-strength, non-staining and non-permeable epoxy paving grout designed for smooth outdoor porcelain paving, tiles and smooth stone. It should only be used on surfaces where a finishing scraper can be smoothly pulled across the paving to remove excess grout. Not suitable for rough, uneven, textured or hand-cut paving edges.
- Do not use Joint-It Porcelain Epoxy Grout in temperatures below 5°C or above 25°C.
- Before application, ensure the paving joints are between 1–5mm wide and have a minimum depth of 10mm. Joint-It is particularly suitable for the 2mm and 3mm joints commonly used with modern porcelain paving.
- Make sure all porcelain tiles or paving slabs are securely laid on a full-contact, solid base with no movement in the slabs before applying the epoxy grout.
- Ensure the paving is completely dry, clean and free from dirt, dust and debris before beginning the Joint-It epoxy grout application process.
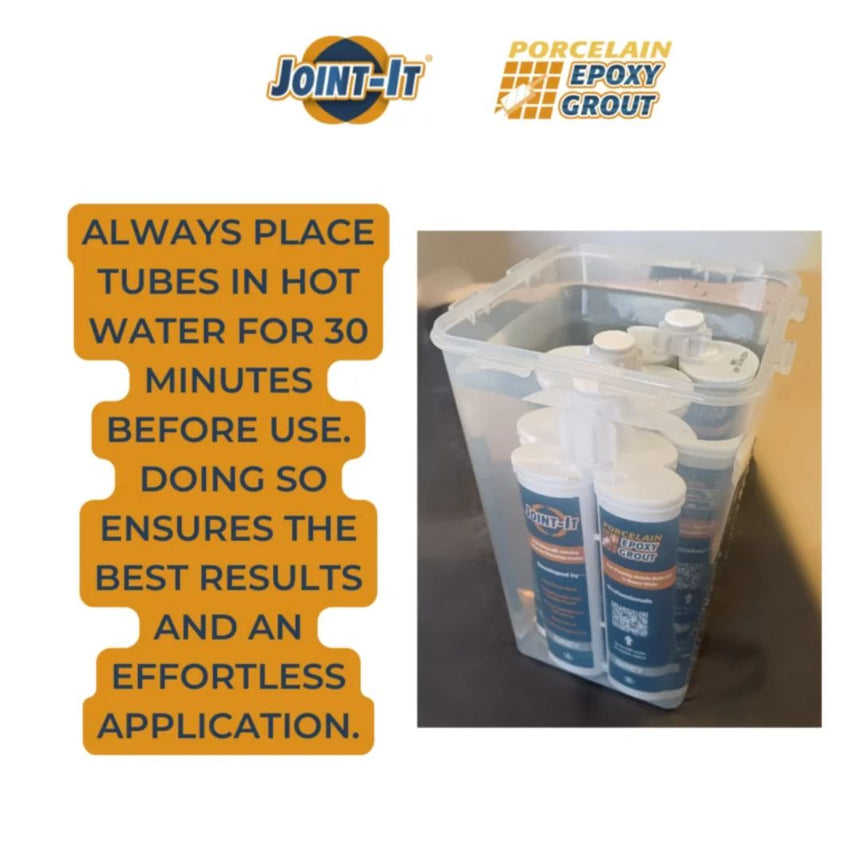
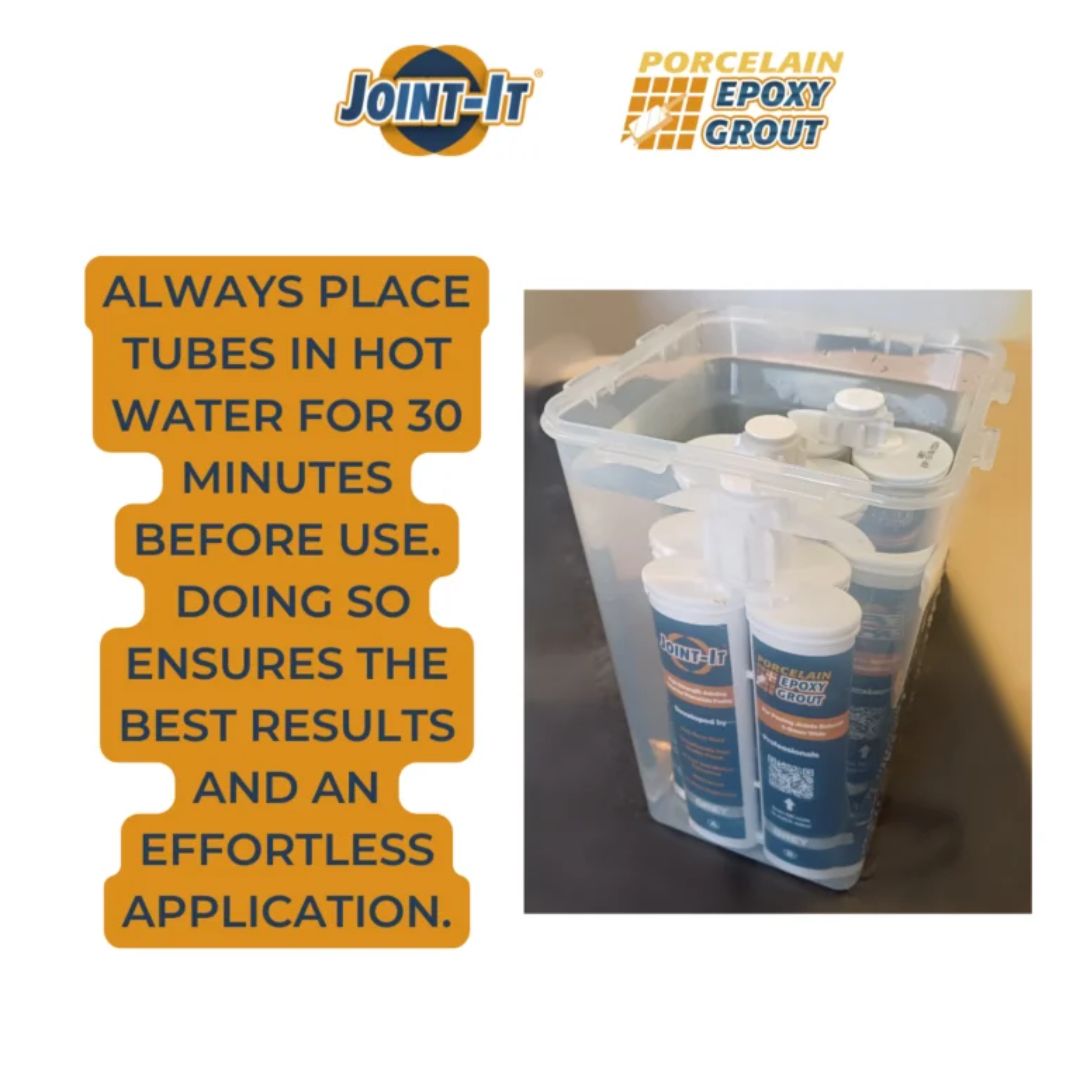
- Approximately 30 minutes before application, place the Joint-It 400ml dual cartridge in warm water to soften the epoxy grout. While the cartridge is warming, prepare the paving and application area.
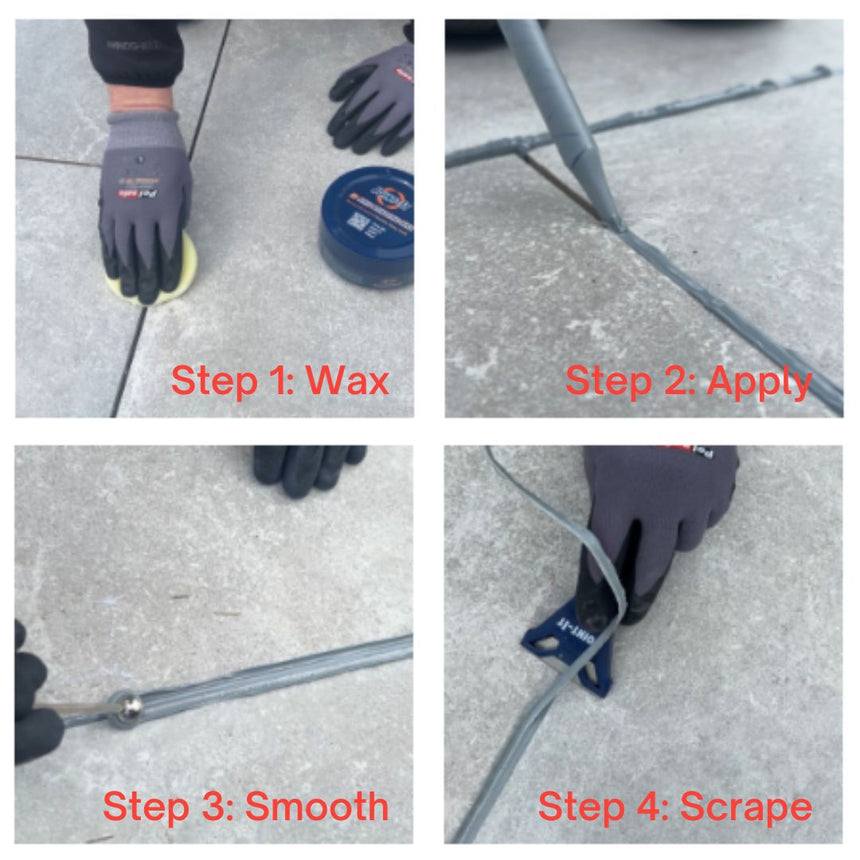
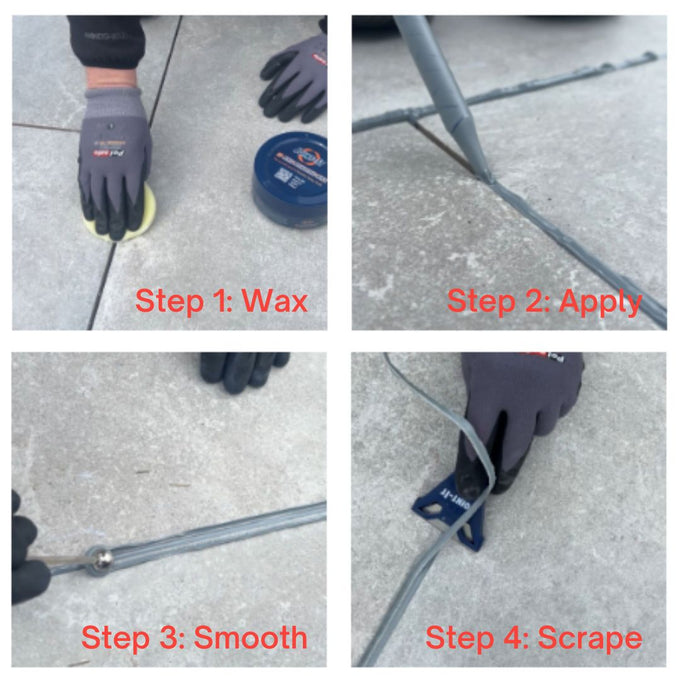
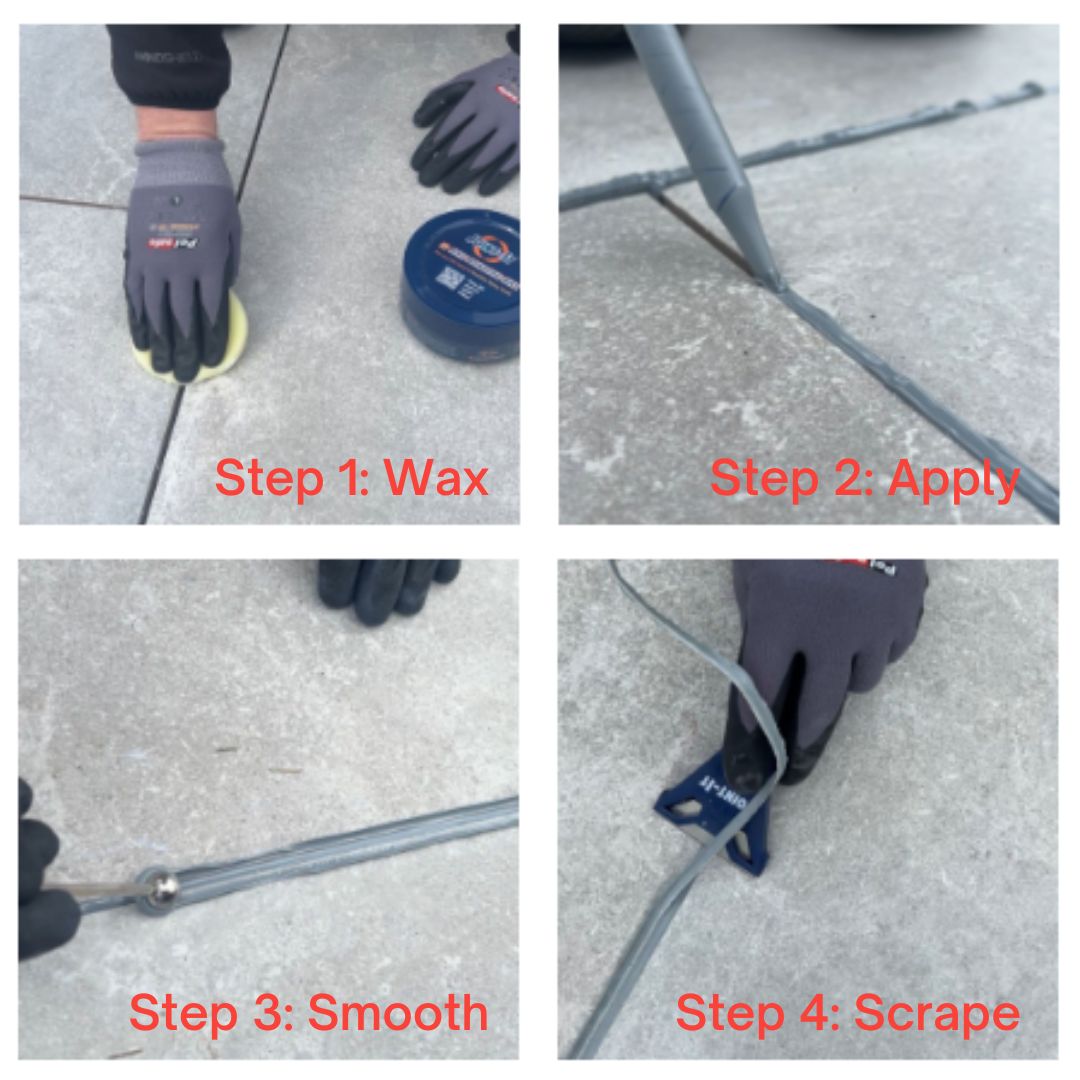
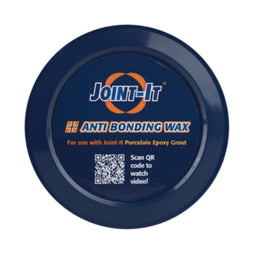
- Using the supplied sponge, apply a generous amount of Joint-It Anti Bonding Wax to the top of the paving along both sides of the joints. The wax creates a barrier between the epoxy grout and the paving surface, helping excess grout peel away more easily after setting.
- Apply the Anti Bonding Wax no more than 10–15 minutes before grouting for the best results.
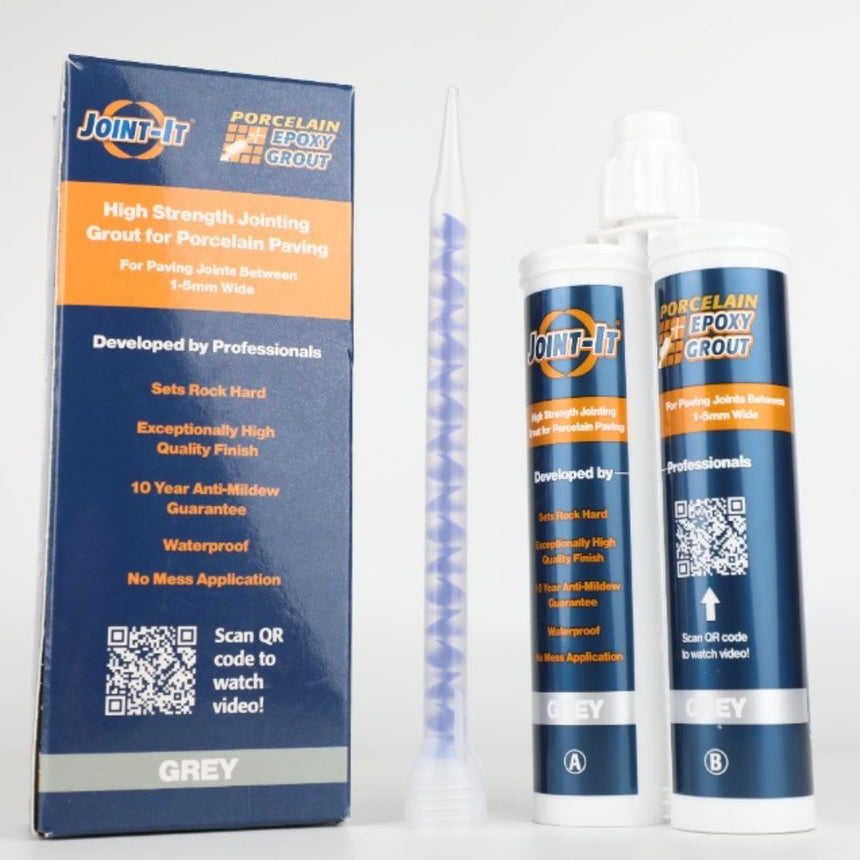
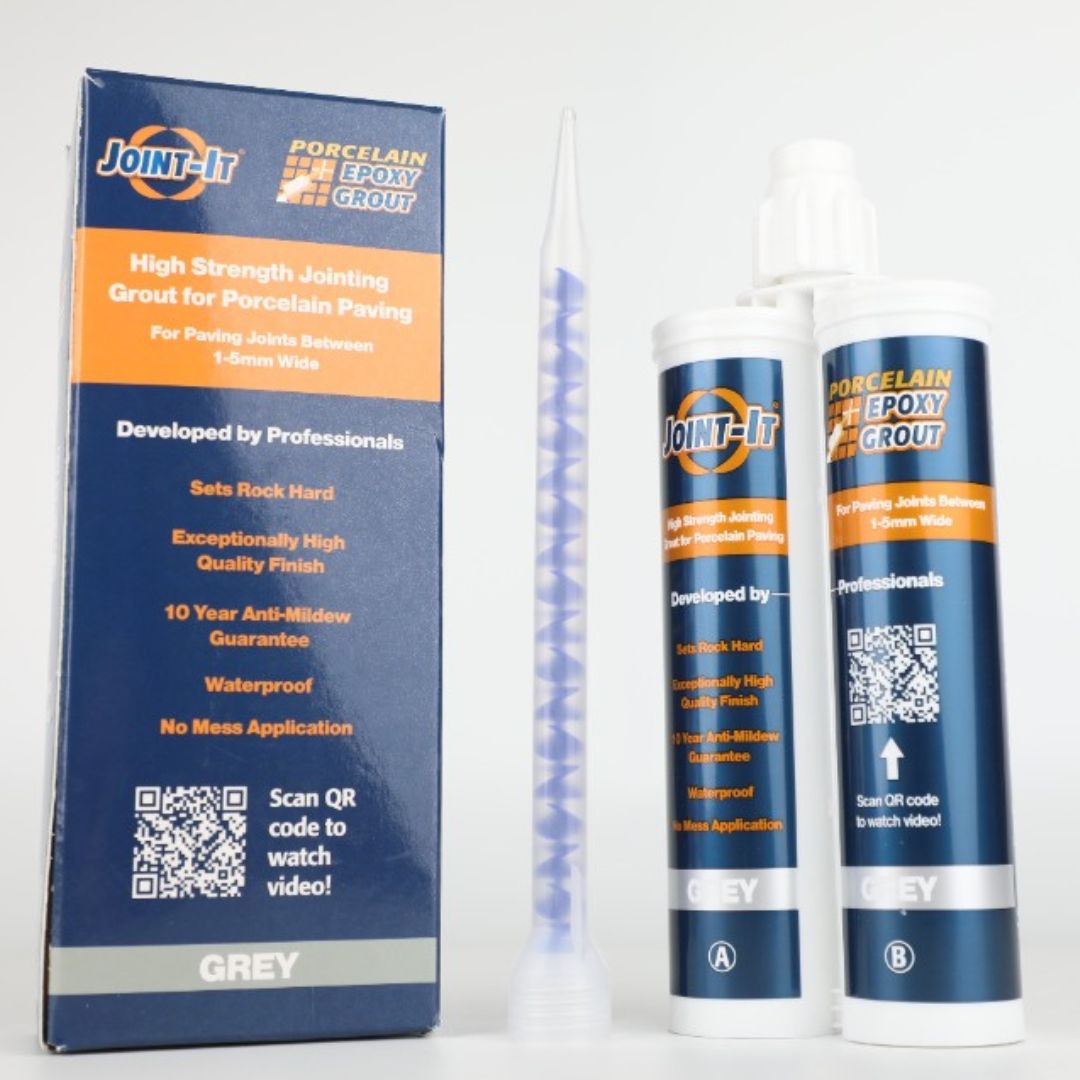
- When ready to grout, remove the twist cap from the Joint-It Porcelain Epoxy Grout cartridge and securely screw on the supplied mixing nozzle.
- Cut the end of the mixing nozzle at approximately 45° using a clean, sharp Stanley knife. Adjust the size of the nozzle opening to suit the width of the paving joint.
- Load the prepared 400ml Joint-It dual cartridge into the Joint-It Manual Application Gun. Pull back the gun plunger or lever, insert the cartridge securely into the gun and push it firmly into position. The manual application gun is designed specifically to provide controlled application of Joint-It epoxy grout without the need for an electric gun.
- Joint-It contains Parts A and B in separate chambers within the 400ml cartridge. As the manual application gun applies pressure to the cartridge, both components are pushed through the mixing nozzle where they are automatically combined and activated.
- Before applying grout to the paving, slowly squeeze the handle of the manual application gun and dispense approximately the first 2cm of epoxy grout. Discard this initial material to ensure Parts A and B have mixed correctly and the epoxy grout is fully activated.
- Place the nozzle directly over the paving joint and gently squeeze the manual gun handle to dispense the Joint-It epoxy grout. Move the gun steadily along the joint, maintaining consistent pressure to achieve an even flow of grout.
- Continue applying the epoxy grout directly into the joint until it is completely filled. Apply enough product for the grout to sit slightly proud of the surface of the paving, allowing it to be tooled and finished correctly.
- The manual Joint-It application gun provides precise control over the flow of epoxy grout, making it particularly suitable for smaller patios, garden paths, repairs, touch-ups and DIY paving projects. For larger areas and continuous professional applications, an electric application gun may be more suitable.
- Leave the Joint-It Porcelain Epoxy Grout for approximately 10–15 minutes to begin setting or ‘go-off’. Setting time can vary depending on temperature and site conditions.
- Once the epoxy grout is semi-set, use the round ball finishing tool to carefully tool the joints. Pull the tool smoothly along the joint to create a neat, smooth and consistent professional finish.
- Once the grout feels hard to the touch, use a suitable sharp blade or grout scraper to carefully peel away and remove excess epoxy grout from the paving surface. If the grout remains sticky or difficult to scrape away cleanly, it has not set sufficiently and should be left for longer before scraping.
- Joint-It Anti Bonding Wax will naturally weather away from the paving surface over the following weeks. There is no need to remove the remaining wax after the epoxy grout application.
- Joint-It Porcelain Epoxy Grout has a professional matte finish. In some conditions, the grout may initially appear slightly glossy after application; this will naturally tone down over the following weeks.
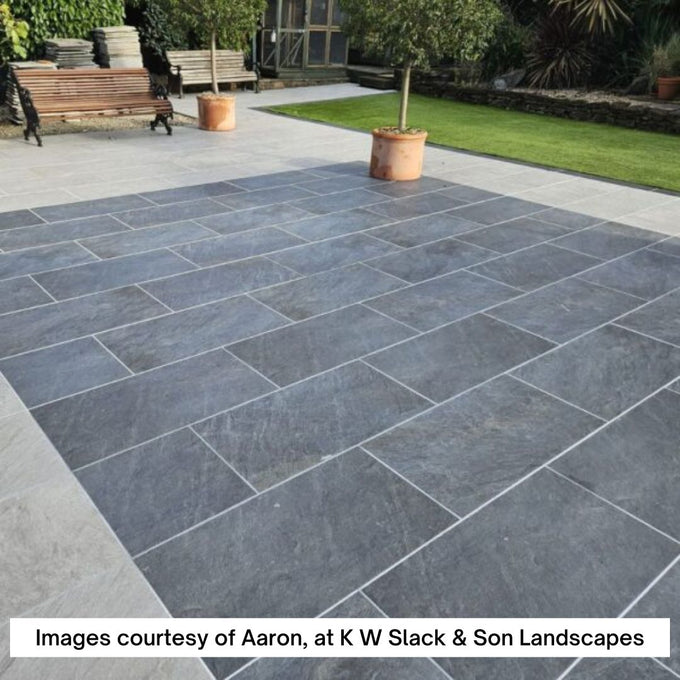
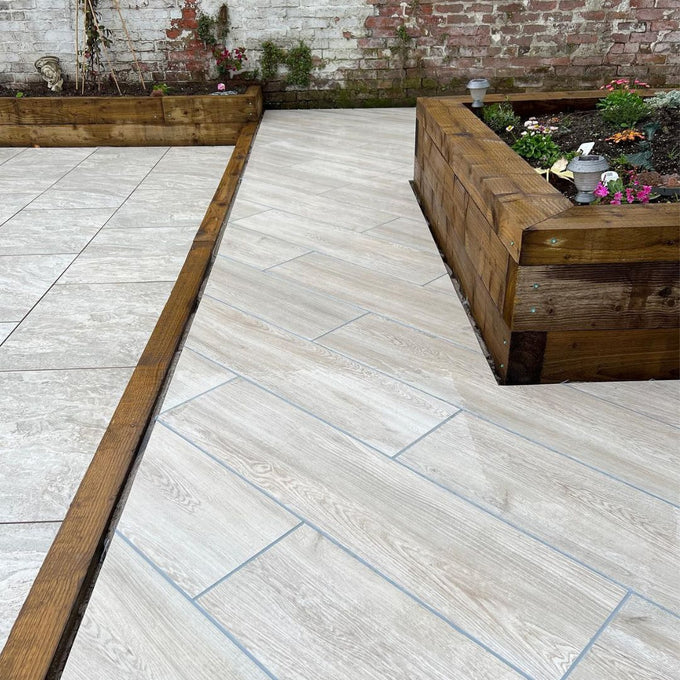
- Once fully cured, Joint-It creates a durable, waterproof and low-maintenance joint for outdoor porcelain paving and smooth stone. The finished grout is pressure washer safe once fully cured.
Delivery & Returns Info
Our delivery charges are calculated based on the size and weight of your order. When you add items to your basket, the delivery charges are displayed. Small orders are distributed via courier; larger orders via Pallet Network. Collection is available from our Tamworth depot by request (contact us first to arrange on 0330 122 1025).
Please note, there is a slight surcharge for areas that are outside of our locality, charges calculated at checkout.
| Weight and size | Next Working Day* Order before 1PM (excl. VAT) |
Standard 3-5 Working Day (excl. VAT) |
|---|---|---|
| 0-13KG (1 small bag/tub) |
£14.00 | £9.00 |
| 13.01-25KG (1 large bag/tub) |
£16.00 | £10.00 |
| 25.01-50KG (2 bags/tubs) |
£26.00 | £19.00 |
| 50.01-75KG (3 bags/tubs) |
£36.00 | £28.00 |
| 75.01-100KG (4-5 bags/tubs) |
£46.00 | £37.00 |
| 100.01-249KG (6-9 bags/tubs) |
£60.00 | £45.00 |
| 249.01-750KG (10 bags plus) |
£68.00 | £48.00 |
| 750.01KG plus (30 bags plus) |
£75.00 | £55.00 |
| Full Pallets (56 bags/52 tubs) |
£88.00 | Free of charge |
| Next Working Day delivery (Premium 1-2 Working Day Service) | +avg. £5-10 Extra. Click here for prices |
|---|---|
| Scotland Delivery Service (Deliveries into some parts of Scotland can take 8-10 working days) | Click here for prices |
| Local Delivery & Click & Collect: | Email: orders@thepavingexperts.co.uk |
Delivery Information
- Prices apply to mainland England and Wales. Scottish delivery slight surcharge.
- Orders are packed and dispatched Monday–Friday (excluding weekends & public holidays).
Next Working Day Delivery
- Order before 1PM → same-day dispatch.
- Order after 1PM or on weekends/bank holidays → next working day dispatch.
- You'll receive tracking updates via email/SMS if you provide your details.
Delivery Examples
- Mon before 1PM → Packed Mon, delivered Tue.
- Mon after 1PM → Packed Tues delivered Wed.
- Fri before 1PM → Packed Fri, delivered Mon.
- Fri after 1PM/weekend → Packed Mon, delivered Tues (or Wed after a bank holiday).
- Standard Service: 3–5 working days.
Notes
- Occasional delays due to manufacturing, supply, or courier issues may happen, but we'll keep you informed.
Returns, cancel up to 14 days from date of delivery. Product to be returned in the same condition & packaging. No returns for cementitious & perishable products. You are responsible for the cost of returning goods to The Paving Experts, 20% admin restock fee applies. Need further info, click here.
For further detailed delivery information click here →
Joint-It Porcelain Epoxy Manual Paving Application Gun
The Easy, No-Mess, No-Fuss Way to Grout Outdoor Porcelain
The Joint-It Manual Application Gun is designed specifically for use with Joint-It 400ml Porcelain Epoxy Grout cartridges, in either Tan, Raven or Grey - providing a simple and controlled way to apply epoxy grout to outdoor porcelain paving and smooth stone.
The manual grout gun makes it easy to apply Joint-It Epoxy Grout directly into porcelain paving joints, helping create a clean, consistent and professional-looking finish with less mess and fuss than traditional grouting methods.
Ideal for smaller patios, repairs, touch-ups and DIY paving projects, the manual application gun gives you precise control over the flow of epoxy grout. It is a practical choice when you want the easy, gun-applied benefits of Joint-It without the need for an electric application gun.
Simply load the 400ml Joint-It dual cartridge into the gun, attach the supplied mixing nozzle and apply the epoxy grout directly into the joint. The gun is compatible with Joint-It Porcelain Epoxy Grout designed for 1–5mm joints with a minimum depth of 10mm.
A simple, reliable and low-mess way to apply Joint-It Epoxy Grout.
Joint-It Porcelain Epoxy Manual Application Gun – Technical Information:
- Product: Joint-It Manual 2-Part Epoxy Grout Application Gun
- Manufacturer: Joint-It
- Capacity: 400ml
- Type: Manual 2-part epoxy grout application gun
- Cartridge compatibility: Designed for 400ml twin/parallel cartridges, including 42mm-diameter parallel tubes.
- Purpose: Designed to apply two-part Joint-It Porcelain Epoxy Grout by forcing Parts A and B through the supplied mixing nozzle and directly into the paving joint.
- Controlled application: Provides controlled, accurate and even dispensing of thick epoxy grout directly into paving joints.
- Operation: The manual trigger and handle apply pressure to the cartridge, dispensing the two epoxy components through the mixing nozzle where they are automatically combined.
- Ideal for: Smaller patios, garden paths, repairs, touch-ups, DIY paving projects and occasional paving work.
- Larger projects: For larger areas or continuous professional applications, a battery or electric application gun may be more suitable, providing faster application with less manual effort.
- Epoxy grout consistency: Joint-It Porcelain Epoxy Grout is a thick two-part epoxy, so sufficient pressure is required to dispense the product. Warming the cartridge in warm water before application helps soften the grout and makes dispensing easier.
- Cartridge preparation: Remove the twist cap from the Joint-It 400ml cartridge and securely attach the supplied mixing nozzle before loading the cartridge into the application gun.
- Nozzle preparation: Cut the mixing nozzle at approximately 45° using a clean, sharp Stanley knife. Adjust the opening to suit the paving joint, ensuring the aperture is large enough to allow the epoxy grout to flow smoothly.
- Initial discharge: Before applying the grout to the paving, dispense and discard approximately the first 2cm of material. This ensures Parts A and B have mixed thoroughly and the epoxy grout has activated. The material should appear as a consistent, uniform colour before application.
- Application technique: Place the nozzle directly over or into the paving joint and operate the manual gun slowly and continuously. Maintain consistent pressure and movement to achieve an even flow of epoxy grout and minimise gaps within the joint.
- Joint filling: Apply enough Joint-It Porcelain Epoxy Grout to completely fill the joint, allowing the grout to sit slightly proud of the paving surface so it can be tooled and finished correctly.
- Cleaning and maintenance: Clean any residual epoxy grout from the application gun after use to help prevent material from curing within the gun and maintain reliable performance.
- Gun supplied separately: The Joint-It Manual Application Gun is an application accessory and does not include the Joint-It Porcelain Epoxy Grout cartridge unless purchased as part of a specific kit.
Delivery & Returns Info
Our delivery charges are calculated based on the size and weight of your order. When you add items to your basket, the delivery charges are displayed. Small orders are distributed via courier; larger orders via Pallet Network. Collection is available from our Tamworth depot by request (contact us first to arrange on 0330 122 1025).
Please note, there is a slight surcharge for areas that are outside of our locality, charges calculated at checkout.
| Weight and size | Next Working Day* Order before 1PM (excl. VAT) |
Standard 3-5 Working Day (excl. VAT) |
|---|---|---|
| 0-13KG (1 small bag/tub) |
£14.00 | £9.00 |
| 13.01-25KG (1 large bag/tub) |
£16.00 | £10.00 |
| 25.01-50KG (2 bags/tubs) |
£26.00 | £19.00 |
| 50.01-75KG (3 bags/tubs) |
£36.00 | £28.00 |
| 75.01-100KG (4-5 bags/tubs) |
£46.00 | £37.00 |
| 100.01-249KG (6-9 bags/tubs) |
£60.00 | £45.00 |
| 249.01-750KG (10 bags plus) |
£68.00 | £48.00 |
| 750.01KG plus (30 bags plus) |
£75.00 | £55.00 |
| Full Pallets (56 bags/52 tubs) |
£88.00 | Free of charge |
| Next Working Day delivery (Premium 1-2 Working Day Service) | +avg. £5-10 Extra. Click here for prices |
|---|---|
| Scotland Delivery Service (Deliveries into some parts of Scotland can take 8-10 working days) | Click here for prices |
| Local Delivery & Click & Collect: | Email: orders@thepavingexperts.co.uk |
Delivery Information
- Prices apply to mainland England and Wales. Scottish delivery slight surcharge.
- Orders are packed and dispatched Monday–Friday (excluding weekends & public holidays).
Next Working Day Delivery
- Order before 1PM → same-day dispatch.
- Order after 1PM or on weekends/bank holidays → next working day dispatch.
- You'll receive tracking updates via email/SMS if you provide your details.
Delivery Examples
- Mon before 1PM → Packed Mon, delivered Tue.
- Mon after 1PM → Packed Tues delivered Wed.
- Fri before 1PM → Packed Fri, delivered Mon.
- Fri after 1PM/weekend → Packed Mon, delivered Tues (or Wed after a bank holiday).
- Standard Service: 3–5 working days.
Notes
- Occasional delays due to manufacturing, supply, or courier issues may happen, but we'll keep you informed.
Returns, cancel up to 14 days from date of delivery. Product to be returned in the same condition & packaging. No returns for cementitious & perishable products. You are responsible for the cost of returning goods to The Paving Experts, 20% admin restock fee applies. Need further info, click here.
For further detailed delivery information click here →
Joint-It Porcelain Epoxy Grout Application Process Using the Manual Application Gun:
- Joint-It Porcelain Epoxy Grout is a high-strength, non-staining and non-permeable epoxy paving grout designed for smooth outdoor porcelain paving, tiles and smooth stone. It should only be used on surfaces where a finishing scraper can be smoothly pulled across the paving to remove excess grout. Not suitable for rough, uneven, textured or hand-cut paving edges.
- Do not use Joint-It Porcelain Epoxy Grout in temperatures below 5°C or above 25°C.
- Before application, ensure the paving joints are between 1–5mm wide and have a minimum depth of 10mm. Joint-It is particularly suitable for the 2mm and 3mm joints commonly used with modern porcelain paving.
- Make sure all porcelain tiles or paving slabs are securely laid on a full-contact, solid base with no movement in the slabs before applying the epoxy grout.
- Ensure the paving is completely dry, clean and free from dirt, dust and debris before beginning the Joint-It epoxy grout application process.
- Approximately 30 minutes before application, place the Joint-It 400ml dual cartridge in warm water to soften the epoxy grout. While the cartridge is warming, prepare the paving and application area.
- Using the supplied sponge, apply a generous amount of Joint-It Anti Bonding Wax to the top of the paving along both sides of the joints. The wax creates a barrier between the epoxy grout and the paving surface, helping excess grout peel away more easily after setting.
- Apply the Anti Bonding Wax no more than 10–15 minutes before grouting for the best results.
- When ready to grout, remove the twist cap from the Joint-It Porcelain Epoxy Grout cartridge and securely screw on the supplied mixing nozzle.
- Cut the end of the mixing nozzle at approximately 45° using a clean, sharp Stanley knife. Adjust the size of the nozzle opening to suit the width of the paving joint.
- Load the prepared 400ml Joint-It dual cartridge into the Joint-It Manual Application Gun. Pull back the gun plunger or lever, insert the cartridge securely into the gun and push it firmly into position. The manual application gun is designed specifically to provide controlled application of Joint-It epoxy grout without the need for an electric gun.
- Joint-It contains Parts A and B in separate chambers within the 400ml cartridge. As the manual application gun applies pressure to the cartridge, both components are pushed through the mixing nozzle where they are automatically combined and activated.
- Before applying grout to the paving, slowly squeeze the handle of the manual application gun and dispense approximately the first 2cm of epoxy grout. Discard this initial material to ensure Parts A and B have mixed correctly and the epoxy grout is fully activated.
- Place the nozzle directly over the paving joint and gently squeeze the manual gun handle to dispense the Joint-It epoxy grout. Move the gun steadily along the joint, maintaining consistent pressure to achieve an even flow of grout.
- Continue applying the epoxy grout directly into the joint until it is completely filled. Apply enough product for the grout to sit slightly proud of the surface of the paving, allowing it to be tooled and finished correctly.
- The manual Joint-It application gun provides precise control over the flow of epoxy grout, making it particularly suitable for smaller patios, garden paths, repairs, touch-ups and DIY paving projects. For larger areas and continuous professional applications, an electric application gun may be more suitable.
- Leave the Joint-It Porcelain Epoxy Grout for approximately 10–15 minutes to begin setting or ‘go-off’. Setting time can vary depending on temperature and site conditions.
- Once the epoxy grout is semi-set, use the round ball finishing tool to carefully tool the joints. Pull the tool smoothly along the joint to create a neat, smooth and consistent professional finish.
- Once the grout feels hard to the touch, use a suitable sharp blade or grout scraper to carefully peel away and remove excess epoxy grout from the paving surface. If the grout remains sticky or difficult to scrape away cleanly, it has not set sufficiently and should be left for longer before scraping.
- Joint-It Anti Bonding Wax will naturally weather away from the paving surface over the following weeks. There is no need to remove the remaining wax after the epoxy grout application.
- Joint-It Porcelain Epoxy Grout has a professional matte finish. In some conditions, the grout may initially appear slightly glossy after application; this will naturally tone down over the following weeks.
- Once fully cured, Joint-It creates a durable, waterproof and low-maintenance joint for outdoor porcelain paving and smooth stone. The finished grout is pressure washer safe once fully cured.